|

PowerPoint Tips
- TNEEL Lecture Slide Presentations
- Using within TNEEL.
- Using PowerPoint to edit or show TNEEL slides.
- Viewing Slide Presentations
- Playing a Presentation
- Within TNEEL.
- From PowerPoint.
- Moving between slides.
- Printing
- Within TNEEL.
- From PowerPoint.
- Printing Options.
- Outline View in PowerPoint
- Notes Pages View in PowerPoint
- Saving PowerPoint Slides to a New Folder
- Step-by-step
- PowerPoint media list (PDF)
TNEEL PowerPoint Presentation Basics
TNEEL PowerPoint presentations can be used within the TNEEL program or
from Microsoft PowerPoint.
Within the TNEEL program:
Clicking a Play button that is associated with a PowerPoint presentation
will start the presentation within the TNEEL program. If you have not
installed TNEEL on your computer the TNEEL CD-ROM must be in your CD
drive, and you will not be able to make any changes to the presentation.
If you have installed TNEEL on your computer you will be able to show
the presentation but not edit it unless you have saved the particular
presentation to a designated folder.
From PowerPoint:
Clicking a Save button that is associated with a PowerPoint presentation
will allow you to save a presentation so that you can open it in Microsoft
PowerPoint. Once it is saved, you will not need the TNEEL CD-ROM to
use the presentation. You will be able to open it in PowerPoint, customize
it, move it to a different computer, and present it in a classroom setting.
PowerPoint provides many tools for editing and reorganizing presentations.
Additional information on creating and editing PowerPoint presentations
can be found in the PowerPoint Help menu.
NOTE: TNEEL presentations are saved as PowerPoint 97 files. There
should be no problems playing the TNEEL presentations in more recent versions
of PowerPoint although PowerPoint may display a notification message about
version differences. Editing and saving presentations in more recent versions
of PowerPoint is OK, but may make it more difficult to play the presentation
again using older versions.

Viewing Slide Presentations
To view a TNEEL slide presentation:
Within the TNEEL program:
Click the Play button that is associated with the presentation.
Within PowerPoint:
Select the folder in which the TNEEL PowerPoint presentations are located.
Open an existing presentation from the PowerPoint Open menu.
To move between slides while viewing a slide show presentation:
 |
Mouse:
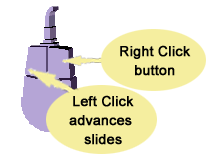
Click the left mouse button on the slide to advance.
Clicking the right mouse button will display a small menu with
options to go forward or backward in the presentaion.
|
 |
Arrow Keys:
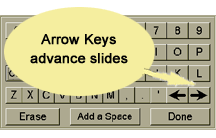
Pressing the right arrow key will advance to the next slide. Pressing
the left arrow key will go back to the previous slide.
|
 |
Scroll Bar:
While viewing a presentation inside of TNEEL, you can use the
scroll bar to the right of the image to quickly go to any point
in the presentation.
|

Printing TNEEL PowerPoint Presentations
TNEEL PowerPoint presentations can be printed either from inside the
TNEEL program, or from Microsoft Powerpoint.
To Start Printing:
Within the TNEEL program:
Click the right mouse button on the presentation image and select Print
from the menu that appears.
From PowerPoint:
Choose Print from the PowerPoint File menu.
Print Options:
Selecting a Printer
If you have multiple printers available, select the appropriate one.
You might want to print slide notes to a color printer and the outline
to a black & white laser printer.
Pages to print
All
- prints all slides in the presentation
Current
Slide - prints only the slide that is currently displayed.
Slides
- prints only the slides, or range of slides specified in the text box.
Number of copies
Select how many copies of each page to print.
B&W or color
Make sure this option is not selected if you are using a color printer.
Views to print
Slides
- prints only slides
Handouts
- prints smaller images, 3 to 6 slides per page with lines for notes.
Notes
Pages - prints small image of one slide and any additional speaker
notes for that slide.
Outline
View - prints the outline view of the slide content.

Screen shot reprinted by permission from
Microsoft Corporation.

PowerPoint Outline View
The PowerPoint Outline view provides a linear outline of the entire presentation.
Each individual slide is represented by a numbered heading with major
points appearing below it as bulletted, or indented items. Printing a
presentation outline may be useful as a lecture guide or as a classroom
handout.

Screen shot reprinted by permission from Microsoft
Corporation.
(Note: The Outline can only be viewed from PowerPoint. It is
not viewable from within TNEEL.)
With the presentation open in Microsoft PowerPoint, Select Outline from
the View menu to switch to the Outline View.

PowerPoint Notes Pages View
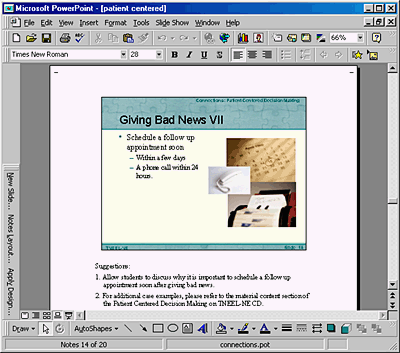
The PowerPoint Notes Pages provides an image of each slide along with
space for speaker notes. TNEEL presentation notes pages include background
information, references and instructional suggestions. Print the speaker
notes and take them to class as a reference during your presentation.

Screen shot reprinted by permission from Microsoft Corporation
(Note: The Notes Pages can only be viewed from PowerPoint.
They are not viewable when playing a presentation from within TNEEL, but
they can be printed from either TNEEL or PowerPoint.)
With the presentation open in Microsoft PowerPoint, Select Notes Pages
from the View menu to switch to the Notes Pages View.

Saving PowerPoint Slides to a New Folder
 |
Learn more on how to save PowerPoint
slides in the following Help section:
Save Function / Saving PowerPoint
Presentations
|
You may want to save the PowerPoint slides in a NEW directory
outside of "TNEEL-NE" or other default folders. This gives you
flexibility to use (or modify) the PowerPoints anywhere — at home,
in a class, or at a conference. But in order to copy the PowerPoints (.ppt)
files and have them work correctly, you need to move all audio and video
files that are "linked" to each PowerPoint presentation.
Here is an example of how your new directory could
look:

Follow these directions to ensure your PowerPoint slides
preserve all necessary media "links" when moved to new folders. (Some
examples are: "My Document" folder, zip disk, or any folder you choose
to re-name.)
- Find the PowerPoint slide that you want to save. (For example, the
slide "pain assessment lecture.ppt" in the Comfort topic.)
- Copy this file to a new folder. (In this case, C:\My Documents\Pain
Assessment SLIDES)
- Find corresponding media of "pain assessment lecture.ppt"
in this PDF: Powerpoint_MediaList.PDF
- See the"Media File Names" column in this PDF. Notice all corresponding
audio or video (media).
- All audio files (.mp3) are to be copied into a folder named "Audio"
- All video files (.wmvare to be copied into a folder named "Video"
- Your PowerPoint slide should be saved in the same directory, next
to the "Audio" and "Video" folders. NOTE: DO NOT CHANGE THE NAME OF
THE POWERPOINT FILES.
|


